How to avoid horror stories when installing polymeric sand?

• Clean the pavers perfectly before activating polymer sand with water
• Respect the recommended weather conditions : temperature between 10°C and 30°C
• Use the right amount of water during activation without drowning the joints
• Sweep away excess sand completely before watering to avoid haze
• Wait at least 24 hours before using the surface for optimal grip
You've just finished your beautiful paver patio and are ready to seal the joints with polymer sand. Everything seems simple until you notice white spots, crumbling joints, or a veiled surface that is impossible to clean. These nightmare scenarios happen more often than you think, but you can avoid them completely.
This article explains the most common mistakes when installing polymer sand and how to avoid them. You will find practical advice, drawn from real situations, to succeed in your project the first time.
What is polymer sand and why are there so many problems?
The polymer sand combines the fiine sand and polymer binders which harden in contact with water. Once activated, it creates a solid barrier between your pavers that prevents weed growth, repels insects, and stabilizes your surface.
The product is causing problems because it's delicate. Too much water, too little water, poor preparation, or poor weather conditions turn a simple project into a costly disaster.
Manufacturers provide specific instructions, but many amateur installers ignore or simplify them. Result: joints that crumble after a few weeks, spotted surfaces or loose pavers.

The five most common mistakes
Do not clean pavers before watering
That is the number one mistake. If you leave polymer sand on the surface of pavers and when you water, the polymer is permanently attached to the stone. You end up with a white or gray veil that can only be removed with a chemical remover.
After sweeping the sand into the joints, iron several times with a clean broom or blower to remove any residual dust.
Watering too hard or for too long
Activation requires water, but not a flood. If you drown the joints, you dilute the polymer which loses its binding properties. Joints remain soft or crumble after drying.
Use a watering can with a hose in fog mode. The objective: to humidify evenly without creating puddles. According to recommendations from the Canada Mortgage and Housing Corporation (CMHC), light and controlled humidification gives the best performance to outdoor materials.
Ignore the weather
Installing polymer sand in hot, cold, or rainy weather almost certainly leads to failure. In hot weather, the product dries too quickly and does not activate properly. In cold weather, it never sets.
If rain arrives within 24 hours after installation, it can wash away the sand before it hardens. Always check the weather forecast for several days before you start.
Fill joints unevenly
Some installers fill the joints to the brim while others leave them half empty. Uneven filling creates weak areas where water seeps in, causing pavers to subside and weeds to thrive.
Walking on the surface too soon
Many think that once watered, the job is done. Walk on the cobbles or drive a car over them before the full plug displaces the still soft sand and breaks the joints.
What to do depending on the situation
Why call in a professional
Installing polymer sand may seem simple on the surface, but it has a lot of technical pitfalls that quickly turn a DIY project into an expensive nightmare. A qualified professional brings much more than a pair of experienced hands.
The equipment makes the difference
Professional vibratory plate compactors offer the precise centrifugal force and frequency required to compact sand properly. Compaction by hand or with inadequate equipment leaves voids that compromise the strength of the joints. Professionals also have the industrial blowers and calibrated sprinkler systems to activate the polymer uniformly.
The local climate experience
In Quebec, freeze-thaw cycles impose specific requirements. An experienced installer knows the subtleties of the local climate : what temperature range should be preferred depending on the season, how to anticipate humidity variations, when to postpone a project despite favorable forecasts. This field expertise avoids failures linked to weather conditions.
The guarantee of a job well done
One certified professional guarantees its installation. If a problem arises — whiteout, crumbling joints, water infiltration — you have recourse. With a failed DIY installation, you alone assume the correction costs, which often far exceed the initial savings.
For large surfaces, commercial projects, car entrances or any installation presenting technical challenges (pronounced slope, complex drainage, pavers of various sizes), calling on a professional is not an expense, It is an investment that protects your property and your budget in the long term.
Best prevention practices
Once your installation is successful, a few simple actions extend the life of your joints.
Clean your surface regularly with a soft broom or blower to avoid the accumulation of organic debris. This debris retains moisture and promotes the growth of foams that can degrade the polymer.
Inspect your joints every spring. If you notice weakened areas, add polymer sand locally rather than waiting for the problem to get worse.
Avoid the use of de-icing salts in winter. Choose pure sand or de-icers designed for paved surfaces. Chemical salts can break down the polymer and create stains.
What to remember before you start
The installation of polymer sand requires rigor and respect for the steps, but it is not complicated. The horror stories you hear almost always come from haste or ignorance of the requirements.
By preparing your surface carefully, choosing the right time and following each step methodically, you will achieve a lasting professional result.
Need help with your project?
If you are not sure that you can manage all the steps or if you want a guaranteed result, our team can assess your surface and offer you the best approach. We help you avoid costly mistakes and get a flawless finish the first time.
Contact us to make an appointment.
FAQ

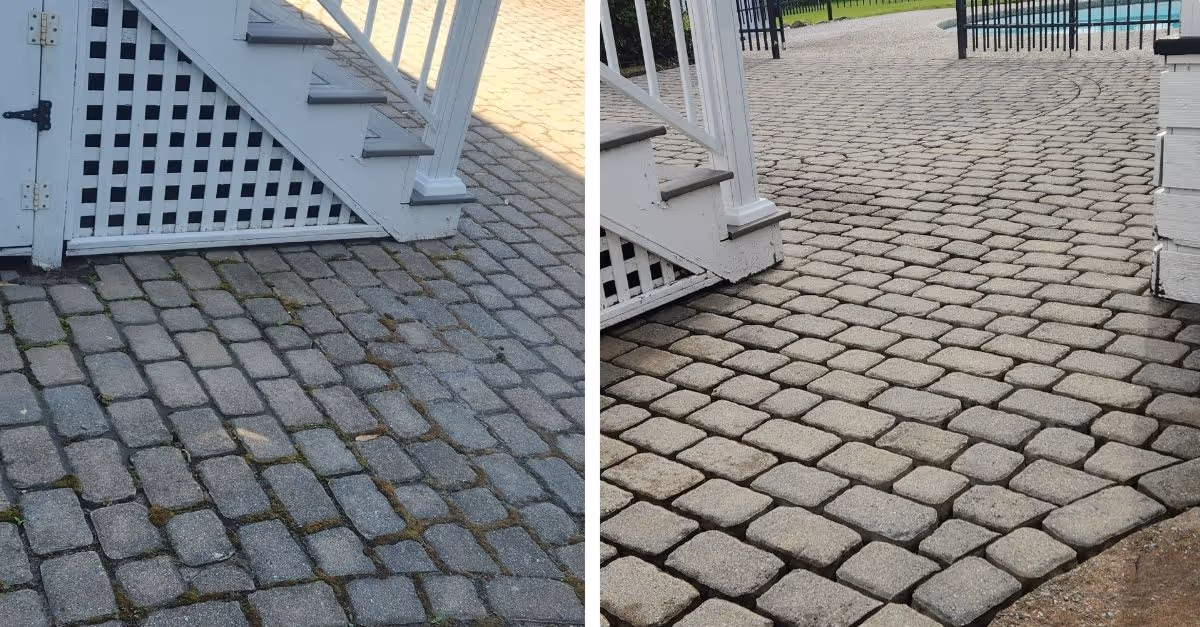
Complete refurbishment of pavers and joints
Deep cleaning, polymer sand removal, mechanical compaction and lasting stabilization.
Learn more about this servicePassionate about outdoor maintenance and attention to detail, she shares practical tips and effective methods for keeping your surfaces clean, durable, and well-maintained.
Are you seeing a similar situation?
Get a detailed evaluation adapted to the real configuration of your property.